Creating Custom Modules
Nikolas Burkoff
2022-03-24
creating-custom-modules.RmdIntroduction
The teal framework provides a large number of analysis
modules to be incorporated into teal applications. However,
it is also possible to create your own modules using the
module() function.
Here is an implementation of a simple module:
library(teal)
example_module <- function(label = "example teal module") {
  checkmate::assert_string(label)
  module(
    label,
    server = function(id, data) {
      checkmate::assert_class(data, "tdata")
      moduleServer(id, function(input, output, session) {
        output$text <- renderPrint(data[[input$dataname]]())
      })
    },
    ui = function(id, data) {
      ns <- NS(id)
      teal.widgets::standard_layout(
        output = verbatimTextOutput(ns("text")),
        encoding = selectInput(ns("dataname"), "Choose a dataset", choices = names(data))
      )
    },
    filters = "all"
  )
}
which can be added into teal apps using
example_module(label = "Label for tab").
Components of a module
UI function
This function contains the UI required for the module. It should be a
function with at least the arguments id. It can also
contain the argument data for access to the application
data. See the server section below for more details.
The UI function can contain standard UI components alongside
additional widgets provided by the teal.widgets package. In
the example above we are using the standard_layout function
of teal.widgets which generates a layout including an
encoding panel on the left and main output covering the rest of the
module’s UI.
Server function
This function contains the shiny server logic for the module and should be of the form:
function(id,
         data, # optional, use if you want your module to access the application data
         filter_panel_api, # optional, use if you want access to the filter panel from your module see teal.slice
         reporter, # optional, use if your module supports reporting, see reporting vignette in teal
         ...) {
  moduleServer(id, function(input, output, session) {
    # module code here
  })
}
When used inside a teal application called with
teal::init, the data argument is a named list
of reactive data.frames containing the data after having been filtered
through the filter panel. It is of the tdata type and can
be created using the new_tdata function.
A More Complicated Example
The teal framework also provides:
- A way to create modules which the generate the R code needed to
reproduce their outputs; these modules use the
teal.codepackage. - A way extract from and merge related datasets using the
teal.transformpackage. - A way to allow app creators to customize your modules also using
teal.transform.
The annotated example below shows these features inside a simple histogram module where app developers can choose what data and which columns from them, their app users can select to be displayed as a histogram.
See the package and function documentation for further details.
library(teal)

# ui function for the module
# histogram_var is a teal.transform::data_extract_spec object
# specifying which columns of which datasets users can choose
ui_histogram_example <- function(id, histogram_var) {
  ns <- NS(id)
  teal.widgets::standard_layout(
    output = plotOutput(ns("plot")),
    encoding = div(
      teal.transform::data_extract_ui(
        id = ns("histogram_var"),
        label = "Variable",
        data_extract_spec = histogram_var
      )
    ),
    # we have a show R code button to show the code needed
    # to generate the histogram
    forms = teal.widgets::verbatim_popup_ui(ns("rcode"), "Show R code")
  )
}

# server function for the module
# histogram_var is a teal.transform::data_extract_spec object
# specifying which columns of which datasets users can choose
srv_histogram_example <- function(id, data, histogram_var) {
  checkmate::assert_class(data, "tdata")
  moduleServer(id, function(input, output, session) {
    # get the selected dataset and column from the UI
    extracted <- teal.transform::data_extract_srv(
      id = "histogram_var",
      datasets = data,
      data_extract_spec = histogram_var,
      join_keys = get_join_keys(data)
    )

    dataname <- reactive(extracted()$dataname)
    selected <- reactive(extracted()$select)

    # the reactive which adds the code to plot the histogram into the qenv
    plot_code_q <- reactive({
      validate(need(length(selected) == 1, "Please select a variable"))

      # take the filtered data from the data object and add it into the qenv environment
      teal.code::new_qenv(tdata2env(data), code = get_code_tdata(data)) %>%
        teal.code::eval_code(
          substitute(
            expr = p <- hist(dataname[, selected]),
            env = list(
              dataname = as.name(dataname()),
              selected = selected()
            )
          )
        )
    })

    # shiny component to view
    output$plot <- renderPlot({
      plot_code_q()[["p"]]
    })

    # Show the R code when user clicks 'Show R Code' button
    teal.widgets::verbatim_popup_srv(
      id = "rcode",
      verbatim_content = reactive(teal.code::get_code(plot_code_q())),
      title = "R Code"
    )
  })
}

# the function which creates the teal module for users
tm_histogram_example <- function(label, histogram_var) {
  checkmate::assert_character(label)
  checkmate::assert_class(histogram_var, "data_extract_spec")

  module(
    label = label,
    server = srv_histogram_example,
    ui = ui_histogram_example,
    ui_args = list(histogram_var = histogram_var),
    server_args = list(histogram_var = histogram_var),
    filters = "all"
  )
}
An example teal application using this module is shown
below:
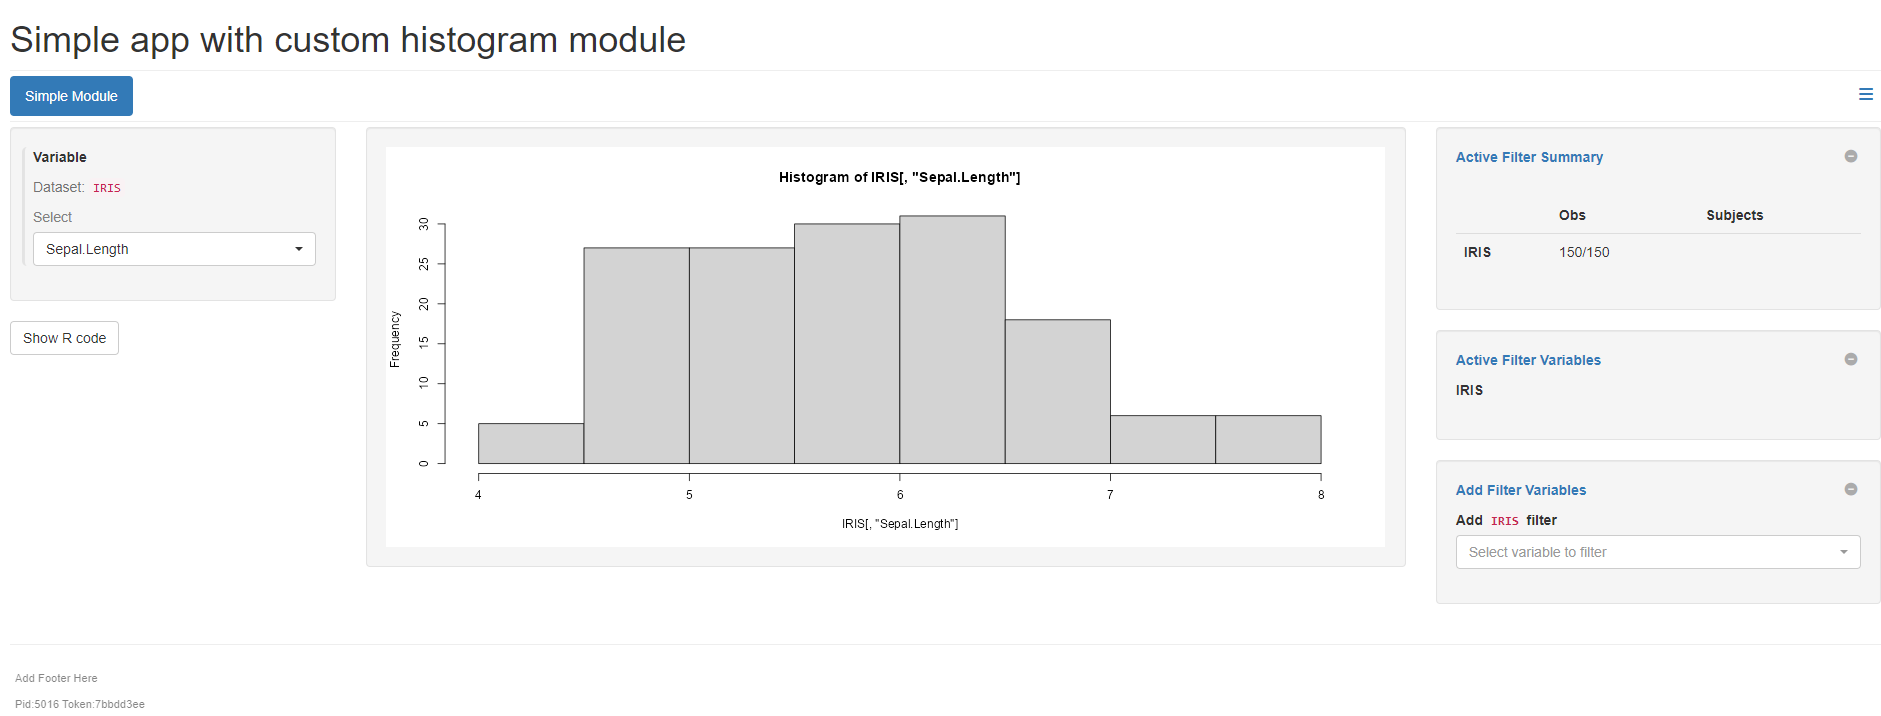
library(teal)

app <- init(
  data = teal_data(
    dataset("IRIS", iris, code = "IRIS <- iris"),
    check = TRUE
  ),
  modules = tm_histogram_example(
    label = "Simple Module",
    histogram_var = data_extract_spec(
      dataname = "IRIS",
      select = select_spec(
        choices = c("Sepal.Length", "Sepal.Width", "Petal.Length", "Petal.Width")
      )
    )
  ),
  header = "Simple app with custom histogram module"
)

if (interactive()) {
  shinyApp(app$ui, app$server)
}
shiny input cycle
When teal modules are run inside the teal::init the
initial shiny input cycle is empty for each of them. In practice, this
means that some inputs might be initialized with NULL
value, unnecessary triggering some observers. A developer has to be
aware of this situation as often It will require shiny::req
or ignoreInit argument in observers or
reactive expressions. This side effect is caused by the
shiny::insertUI function. We are aware of this
inconvenience and have already started to look for a solution.